A Deep Dive into Developing Multi-Tenant Teams Apps
This blog post will delve into the world of Microsoft Teams multi-tenant apps, exploring their benefits, considerations, and the steps to create and deploy them successfully. I’ll demonstrate how to utilize the Teams Toolkit to develop and deploy a Microsoft Teams bot that operates in a multi-tenant environment.
Understanding Multi-Tenancy and Azure Multi-Tenant Apps
As we will be hosting our Teams apps in Azure, you need to understand how multi-tenancy works before deploying your app.
Multi-tenancy refers to a software architecture where a single instance of an application serves multiple customers or tenants. In the context of Azure, a multi-tenant app is an application that serves users from various organizations while securely isolating their data and resources. This architecture offers numerous advantages, such as streamlined administration, resource optimization, and reduced development costs.
I strongly recommend viewing the following video to gain insight into architecting solutions for multiple tenants.
Develop a Multi-Tenant Teams bot
Numerous tools are available for developing Microsoft Teams apps, and they all utilize the Microsoft Teams SDK in the background. Within this piece, my aim is to utilize the Teams Toolkit for the creation of a multi-tenant Teams bot (you can refer to this document for installation instructions). Furthermore, I will use one of the samples equipped with Single Sign-On (SSO) capabilities to transform it into a multi-tenant application.
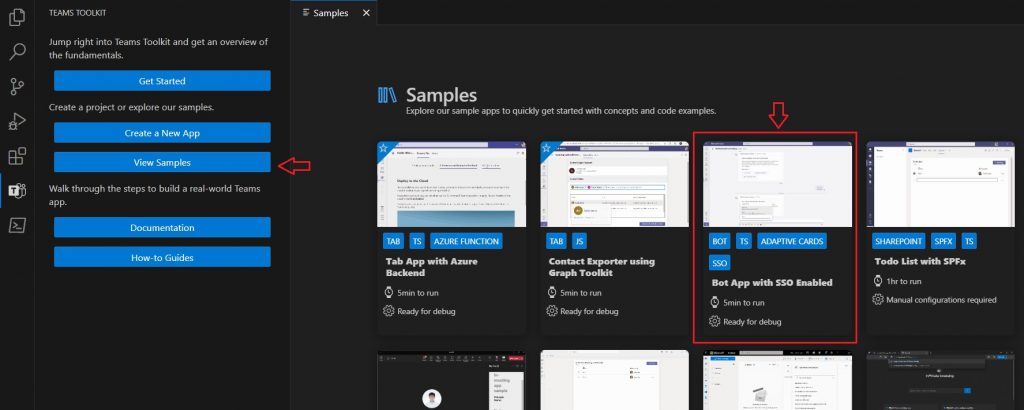
Open Visual Studio Code and from the left bar select Teams Toolkit.
Select “View Samples” and then select “Bot App with SSO Enabled“:
Go ahead and click on “Create,” then hang tight while it wires up the required files for you.
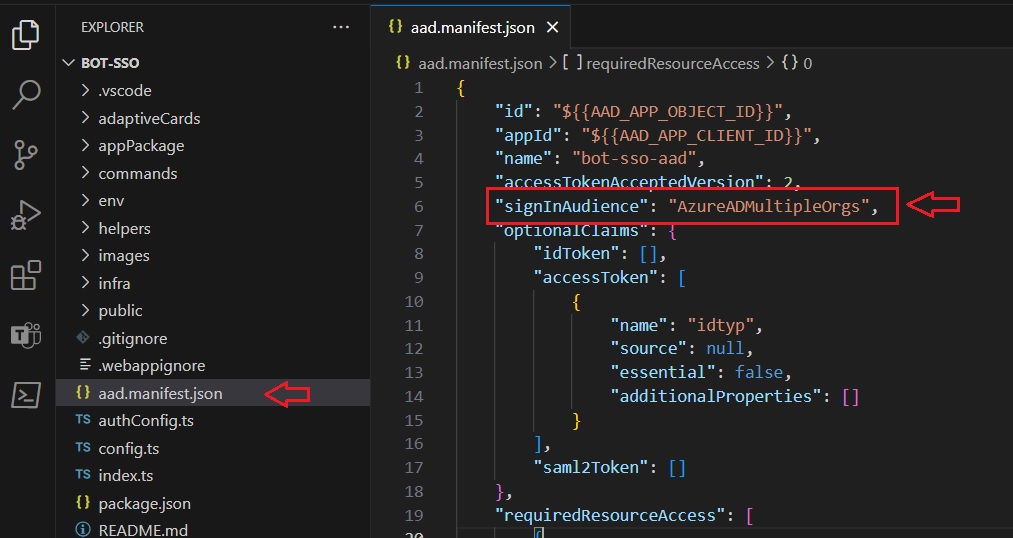
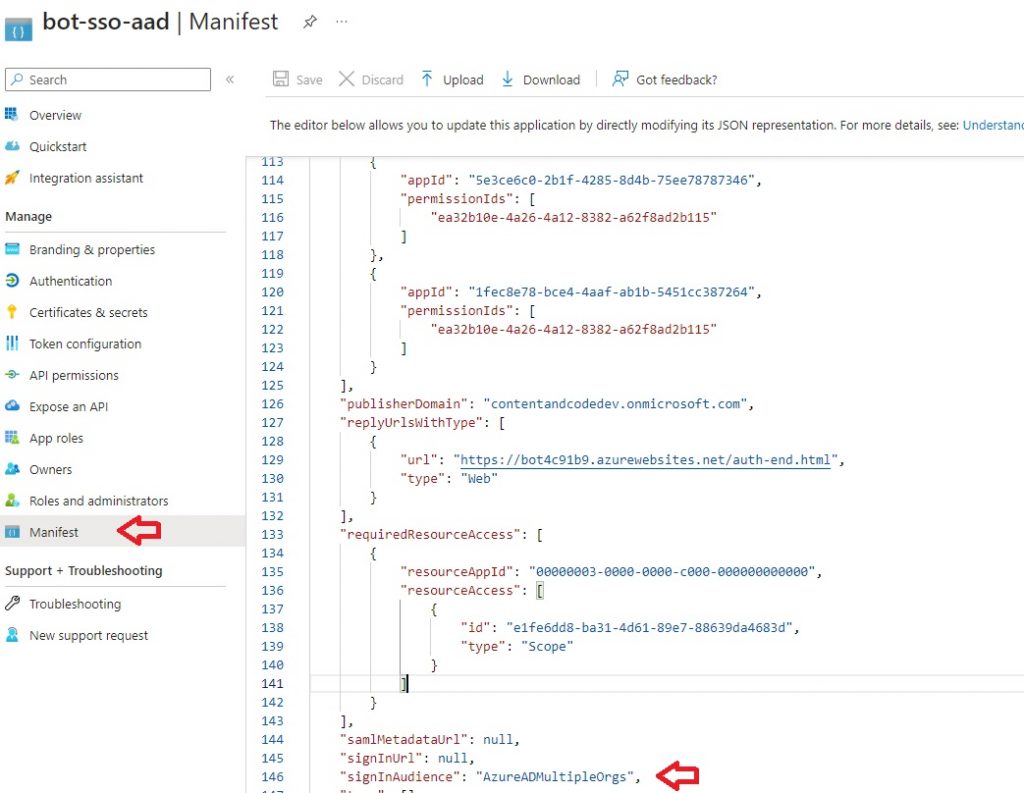
By default, when you create apps using Teams Toolkit, they’re designed for a single tenant. To enable multi-tenancy for registration, you should modify the signInAudience in the aad.manifest.json file. AzureADandPersonalMicrosoftAccount and AzureADMultipleOrgs are both values that can be assigned to the signInAudience (default value is AzureADMyOrg), indicating the scope of users and organizations that can sign in to the application. The key difference is that AzureADandPersonalMicrosoftAccount allows personal Microsoft accounts in addition to work/school accounts from Azure AD, while AzureADMultipleOrgs focuses specifically on enabling multi-tenant access for Azure AD accounts across different organizations.
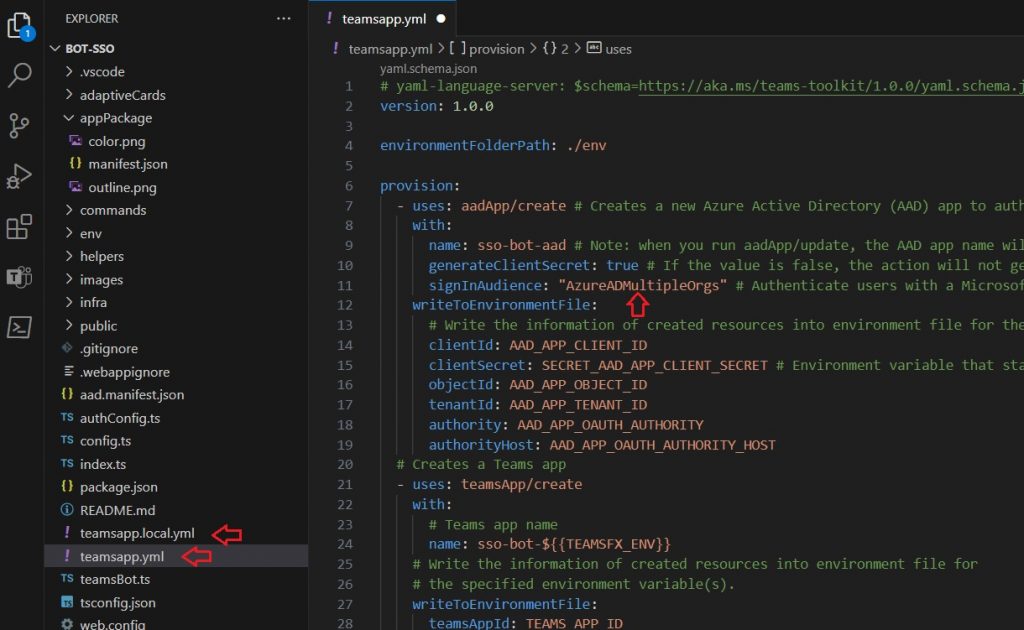
Also update the signInAudience in the teamsapp.yml and teamsapp.local.yml files:
What we should alter next is the endpoint. Open the auth-start.html page and you can see that it utilizes a single tenant endpoint for user authorization.
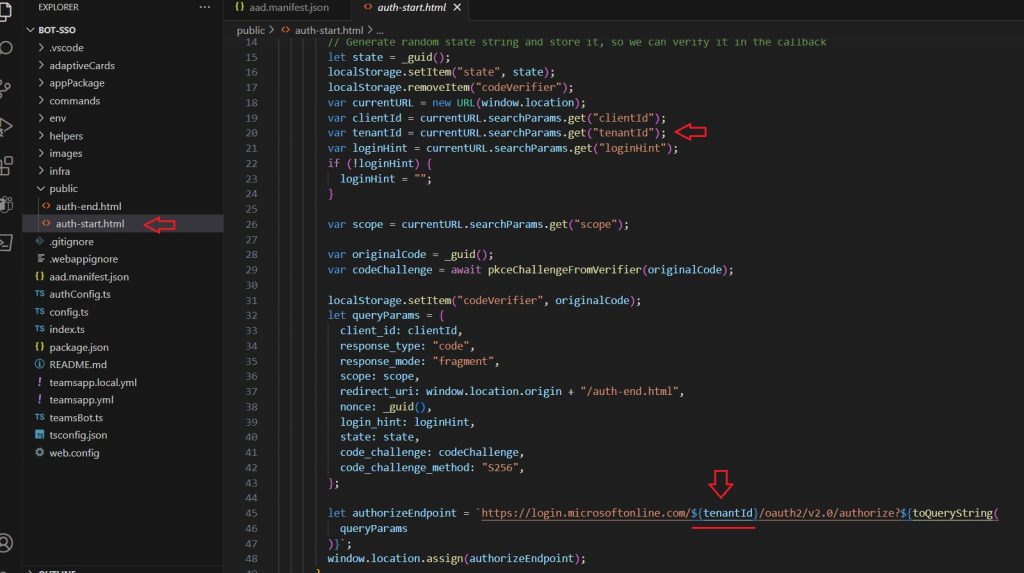
We need to change the tenantId variable to “common“. The common endpoint in Microsoft Azure, often referred to as the “common endpoint URL,” is a single sign-on (SSO) endpoint that can be used by applications to request authentication and authorization from users across different Azure AD tenants and personal Microsoft accounts.
Open config.ts file and change the tenantId property to “common”.
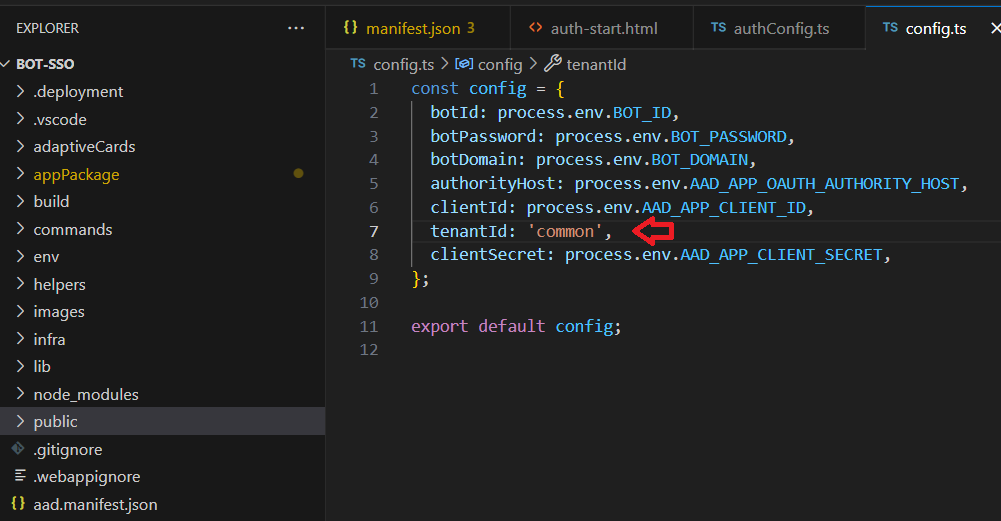
The sign-in response to the application then contains a token representing the user. The issuer value in the token tells an application what tenant the user is from. When a response returns from the /common endpoint, the issuer value in the token corresponds to the user’s tenant.
I’ve made changes to the name and description in the manifest file, but please note that this step is not mandatory, and you’re free to select your own preferences for these details.

The coding part is complete, and I’m leaving the remaining components unchanged because the primary focus of this article is demonstrating the process of creating a multi-tenant app.
Deploying Multi-Tenant Microsoft Teams Apps
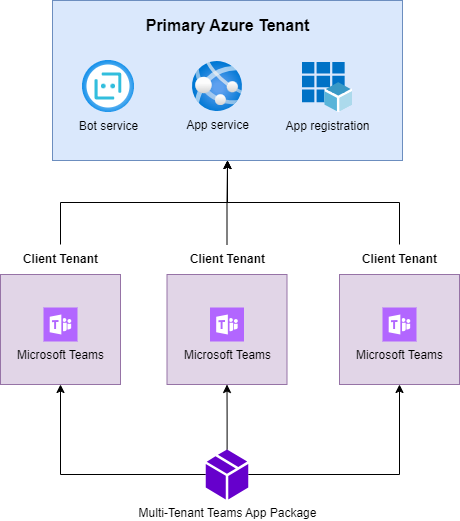
We will host our backend services, including the bot service and app service, along with app registration within a primary Azure tenant. Subsequently, we can distribute the Microsoft Teams package across multiple tenants.
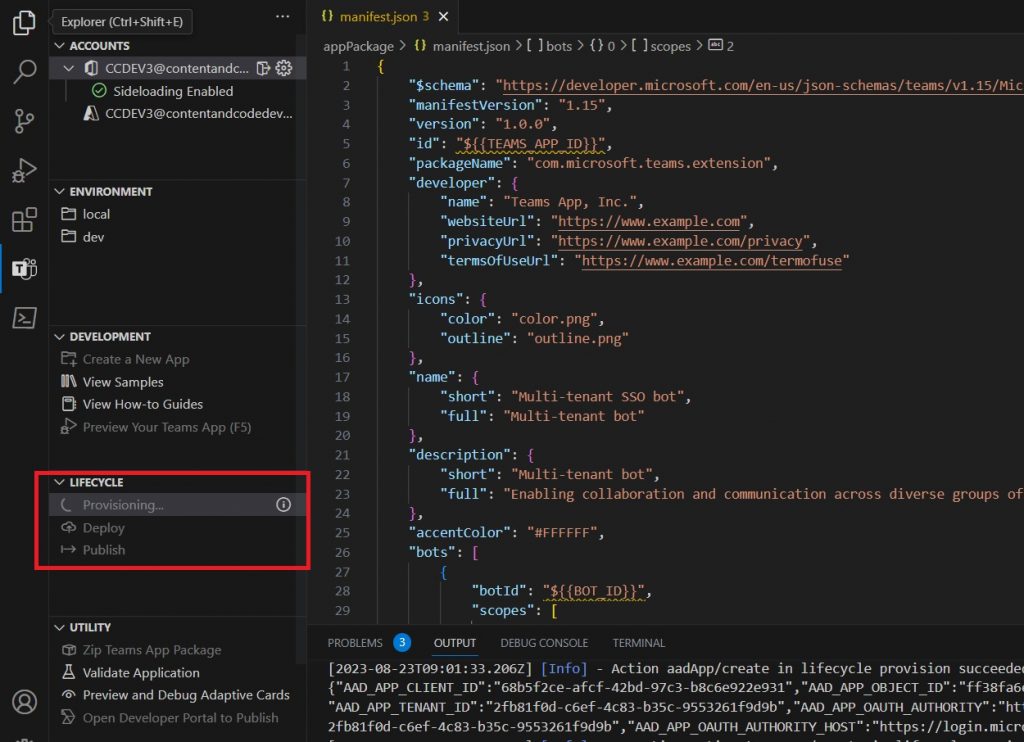
We use the Teams Toolkit to deploy resources to the primary Azure tenant. To begin, open Visual Studio Code and choose “Teams Toolkit” from the left sidebar.
To create the resources in Azure, select Provision from the “lifecycle” section. The steps of the provision command are specified within the teamsapp.yml file.
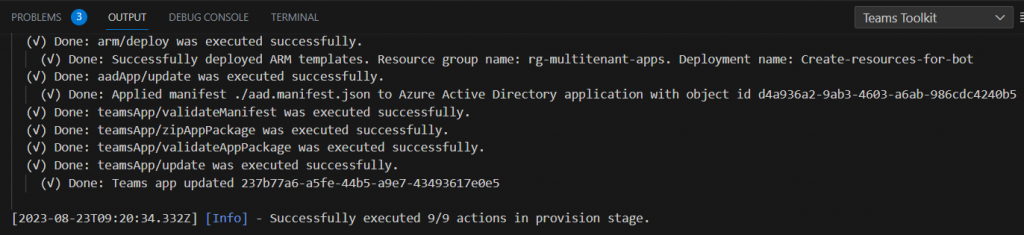
Review the output to confirm the successful execution of all steps:
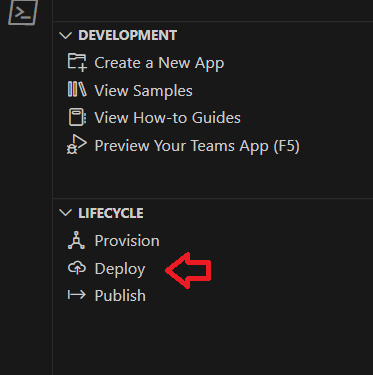
Next, select Deploy from the Lifecycle section to deploy the resources:
Once the deploy action has been completed, navigate to the Azure Portal, access the app registration, and ensure that the signinAudience is accurate:
It’s time to deploy our Teams app package. You have the option to deploy it directly from Visual Studio Code or package it as a zip file and manually deploy it through the Microsoft Teams Admin Center. Since we’re deploying to multiple tenants, let’s choose the latter approach and zip the app package for manual deployment.
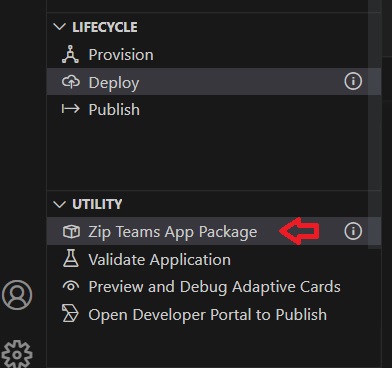
From Visual Studio Code, select Teams Toolkit from the left bar, and select “Zip Teams App Package“:
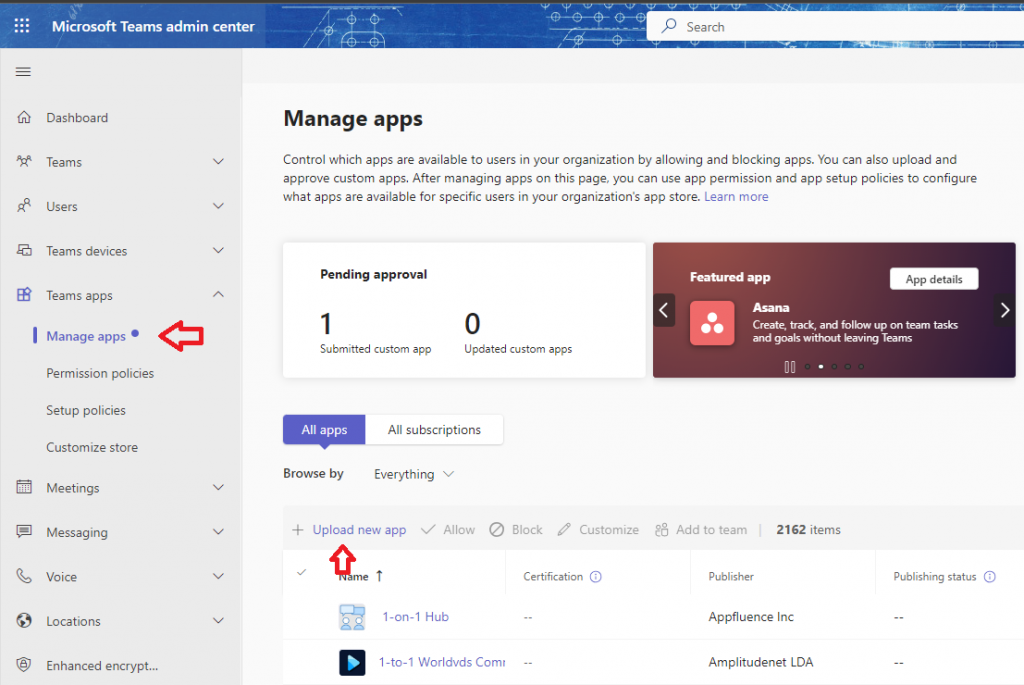
Navigate to Teams admin centre and select Manage Apps, select “Upload new app” and choose the package to upload the app.
Repeat the process to deploy it to other tenants. Before testing the app let’s see how the authentication flow works for a user within a client’s tenant.
Authentication Flow
The following diagram illustrates the process of the authentication flow when a user from a tenant attempts to access the application.
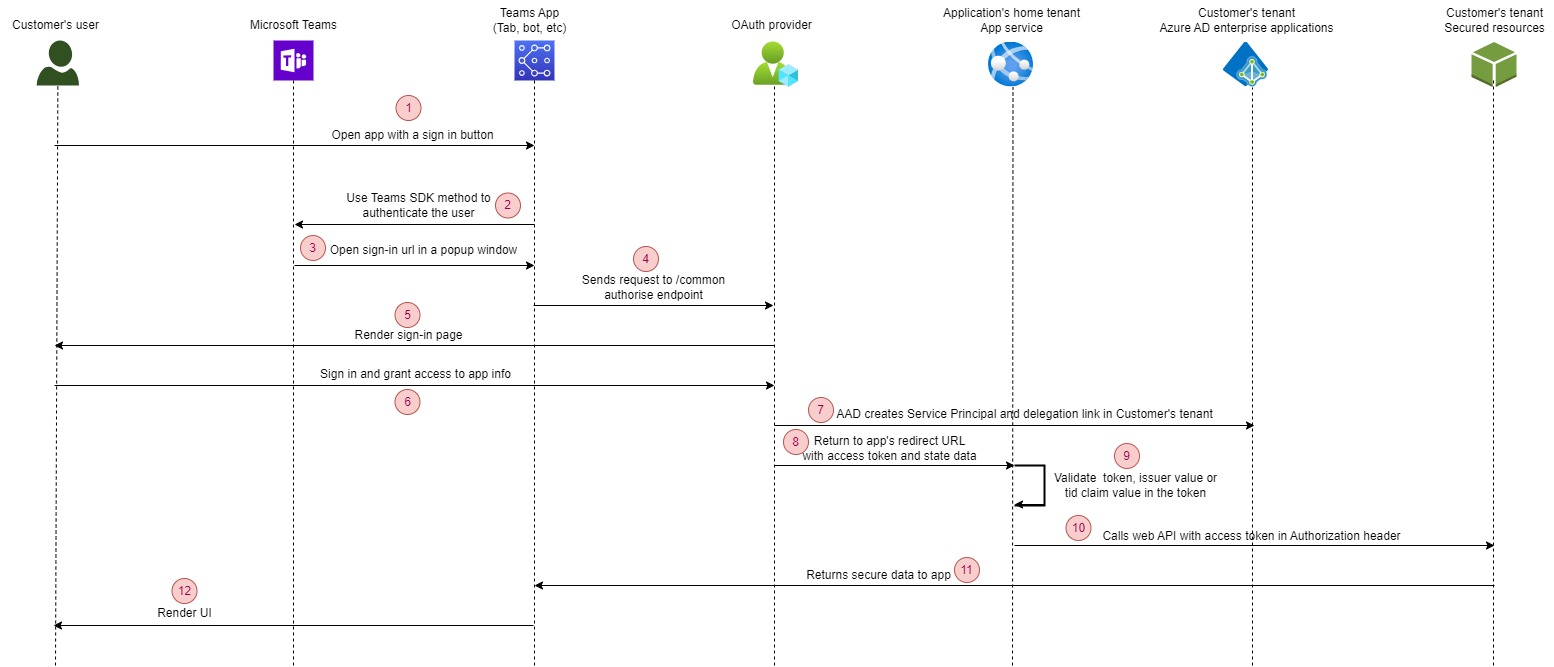
- The user engages with the application, typically through a “Sign in” or “Log in” button.
- The tab constructs the URL for its auth start page, then use Microsoft Teams SDK methods to pop-up a window.
- Teams launches the start page within an iframe that appears in a popup window. Within this start page, random state data is generated and stored for subsequent validation purposes.
- It initiates a redirection to the identity provider’s /authorize endpoint (https://login.microsoftonline.com/common/oauth2/authorize) specific to Azure AD.
- On the provider’s site, sign-in page gets rendered.
- The user logs in and provides authorization to the application. When a user from another tenant signs in to the app for the first time, Azure AD prompts them to approve the permissions requested by the application.
- If they consent, then a representation of the application called a service principal is created in the user’s tenant, and sign-in can continue. A delegation is also created in the directory that records the user’s consent to the application.
- The provider takes the user to the app’s OAuth 2.0 redirect page with an access token.
- The app checks that the returned state value matches what was saved earlier. If a multi-tenant application only allows sign-in from specific tenants who have signed up for their service, then it must check either the issuer value or the tid claim value in the token to make sure that tenant is in their list of subscribers.
- The application submits a request to retrieve data from protected resources.
- Protected data is delivered back to the application.
- The application displays the data to the user.
Testing the bot
The moment of truth has arrived! Let’s see if we can effectively utilize the bot across various tenants.
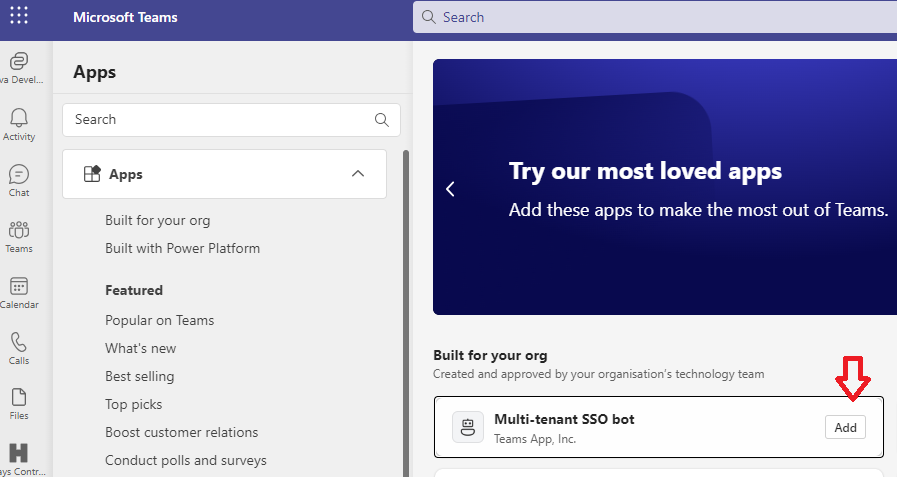
Open Microsoft Teams, select Apps from the left bar and install the bot:
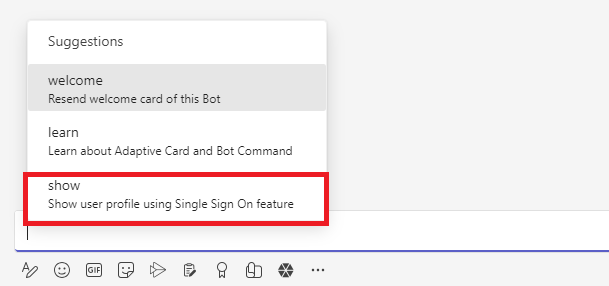
Once bot has installed, select show action from the list of suggestions:
It will ask you to login, select continue:

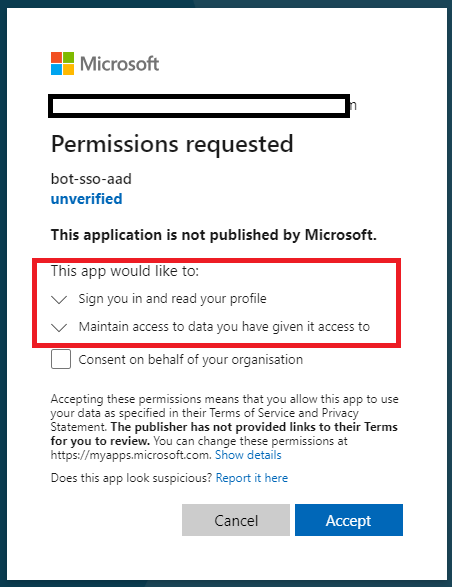
In a popup you will be asked to consent to the permissions requested by the application:
If you check the URL you will notice that it uses common endpoint for user authentication:
https://login.microsoftonline.com/common/oauth2/v2.0/authorize
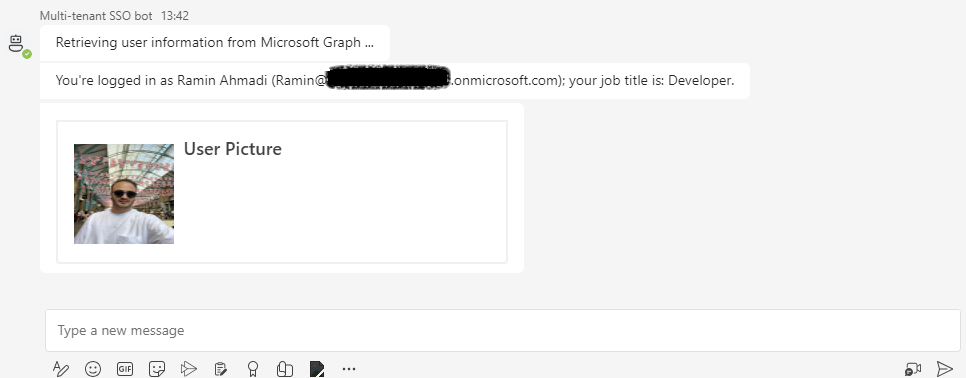
Following the granting of permissions, you’ll be able to view your details, including your name, email address, job title, and profile picture:
If you have another tenant, repeat the process and you should get the same result:

As detailed in the previous section, once an individual logs into your application, a service principal will be generated in their tenant. You can verify this by navigating to the Azure portal, where you will find your app listed under Enterprise Applications:

Conclusion: Empowering Cross-Tenant Collaboration
The era of multi-tenant solutions is upon us, and Microsoft Teams apps are at the forefront of enabling collaboration beyond organizational boundaries. By following the guidelines and insights shared in this blog post, you’ll be equipped to develop multi-tenant Teams apps that transcend limitations, foster collaboration, and empower users across diverse tenants.
Remember you can find the source code here.